In this chapter I'll first say something about the prerequisites and
obstructions to become a dipterist and then give some hints on photography with a binocular.
Taxonomy is currently in an odd situation. On the one hand there are
many people truly interested in natural history and ecology, and
already invest time and money to make photos of insects. On the
other hand taxonomists appear to be more endangered of extinction
than the species they investigate. I think the most important reason
is expressed by the response I got many times, when I told "normal"
people what I do in my spare time: "But you don't kill them?" With
very few exceptions, like large brightly colored butterflies, it is
not possible to learn something useful about insects and how to name
them, if you don't have the specimen. Without a considerable amount
of knowledge, it can easily take an hour to check all the characters
asked for in the key, just to get a reliable family name. And when
you find a similar specimen you definitely want to compare it with
the first one.
If you are already on the way to learn more about insects, here are
three arguments which can help.
1. The common attitude of society is cant:
People would save the life of a fly or moth and carry it outside
back to freedom. Then they drive on a motorway and commit mass
murder.
2. Ecologically it's nonsense:
A female insect typically lays a few hundred eggs. If an
entomologist catches a few specimens of one species, this amounts
to about 1% of the offspring of a single female. To guarantee a
stable population 99% must be removed from the whole generation.
3. Scientifically it's counterproductive:
If we want to preserve nature, we should at least know the species
composition and its change in time.
O.k., let's start. What you need first is a key to the families
of Diptera. The best one I've seen is from Pjotr Oosterbroek,
where you also find an excellent collection of literature guiding
you down to species level. But there are many more keys, most of
them covering smaller areas like a country. Now you need some
specimens.
An easy way to catch a fly is to use a glass jar or a transparent
small plastic bag. Place it slowly over the fly and then push it
down quickly. Almost always the fly tries to escape upwards, to
the direction where it can see the most light. Just close the
glass jar or plastic bag and put it to the freezer (-22°C). After
an hour, or better next day, unfreeze the specimen and start
investigation. If you immediately expose the frozen object to the
warm air, you can see how drops of dew are forming on it, which
mostly disappear after a few minutes. To avoid that use an
airtight glass jar and leave it closed until the dew on the jar
has disappeared.
Many of the insect keys for beginners are sold as "field guide",
pretending you just go outside, catch a specimen and find its name
with a magnification lens. I wouldn't recommend even to try that,
because for a beginner this is highly disappointing. You miss most
of the important characters, which are only visible at higher
magnification, and end up in a guessing game. Before you invest a
lot of effort and time, I'd rather recommend to buy a stereo
microscope, traditionally called "binocular" by biologists. It
shouldn't be a too old one because optics behaves a bit like
microelectronics, it's getting cheaper every year. It's definitely a
good idea to check out a dealer on the internet where you can have a
look at different brands and types and even invest a day's journey,
if necessary. Don't forget to buy one with a third tube to attach
your camera. It is only a bit more costly and much more convenient
than to attach a camera to the tube of an eyepiece. The dealer will
surely inform you, that you need a "cold light source". So it will
probably be useful for you to know that I'm still using a cheap one
with a 20W halogen bulb, operated at 70% brightness. Only in rare
cases (alcoholic material) I use a focusable 10Euro LED torch,
comparable to a 60W bulb.
Now we have a fresh, vivid and movable specimen under the binocular.
The first task is to get it on an insect pin and to direct legs and
wings, such, that we don't have to touch it anymore when it's dried.
Large flies (e.g. Calliphoridae) are pinned diagonally through the
thorax to keep the characters in the middle and at least the
characters of one side intact. For smaller ones (e.g. Fanniidae) we
use micro pins ("Minutien"), pierced again diagonally through the
thorax, but now the micro pin is stuck into a short strip of
polyporus (hardened PE foam) which is then fixed on a normal insect
pin (size 2). Since micro pins are too small to hold them in your
fingers, you need appropriate forceps (try some old ones from your
bathroom) and you will usually work with them only under the
binocular. Very small specimens (e.g. small acalyptrate flies) are
better side pinned. The acute end of the pin is pierced between
ptero- and mesopleuron, but only as deep that you can't see it on
the other side. Now the blunt end is stuck into a strip of polyporus
which is in turn fixed on a normal insect pin.
Once you're more experienced, you'll need more specimens and will
use a sweeping net. Having swept the net a few times over a meadow
or bush it contains tens to hundreds of specimens. You can still try
to extract as many as possible with glass jars and put them to the
freezer. But at this point it could be easier to get some ethyl
acetate from a pharmacy, put some drops of it on a tissue
handkerchief, place it in a large glass jar, build a framework of
wire and place it over the handkerchief, such, that contact of the
net with the fluid is avoided - and you have a simple "killing jar".
To use it, first swing the net quickly a few times to and fro until
all specimens are at its bottom, close it with your hand right above
the bottom, push it swiftly to the jar and close it as far as
possible. After 5-10 minutes all arthropods will be dead. Put them
on a white sheet of paper or card with a fold in the middle and then
transfer them to a small glass jar. Store it again in the freezer.
You'll soon find out that there are many more recipes how to catch
and store Diptera specimens.
At this early stage I wouldn't advise to work with alcohol
material. The colors look different in alcohol and dusting
patterns are much more difficult to see. And most keys even expect
you to use completely dried material, because this was what the
author used to prepare the key (in a museum).
Now some words on photography under the
binocular. There are five points I'd like to mention: orientation,
white balance, brightness of the background, focus stacking, and
scaling for presentation.
Again there are many methods to orient a specimen. Holding the pin
in your hand is possible, but very inconvenient, especially at a
higher magnification. You can try to use a cork stopper or modelling
clay. I found it very convenient to use the "entoball" from
stefan.ober@entoball.com. It's a metallic globe with an opening on
one side containing polyporus, where you can insert the pin. The
globe is placed on a socket and can be rotated freely in all
directions.
As the sensor can't know whether your are illuminating a red object
with white light or a white object with red light, you must always
apply a manual white balance. Consumer electronics cameras do an
excellent job on that, check your manual. If you're using a
"microscope camera", actually a bare sensor equipped with a USB
interface, you have to do it in your image editing program. (In gimp
you'd use the "levels" tool.)
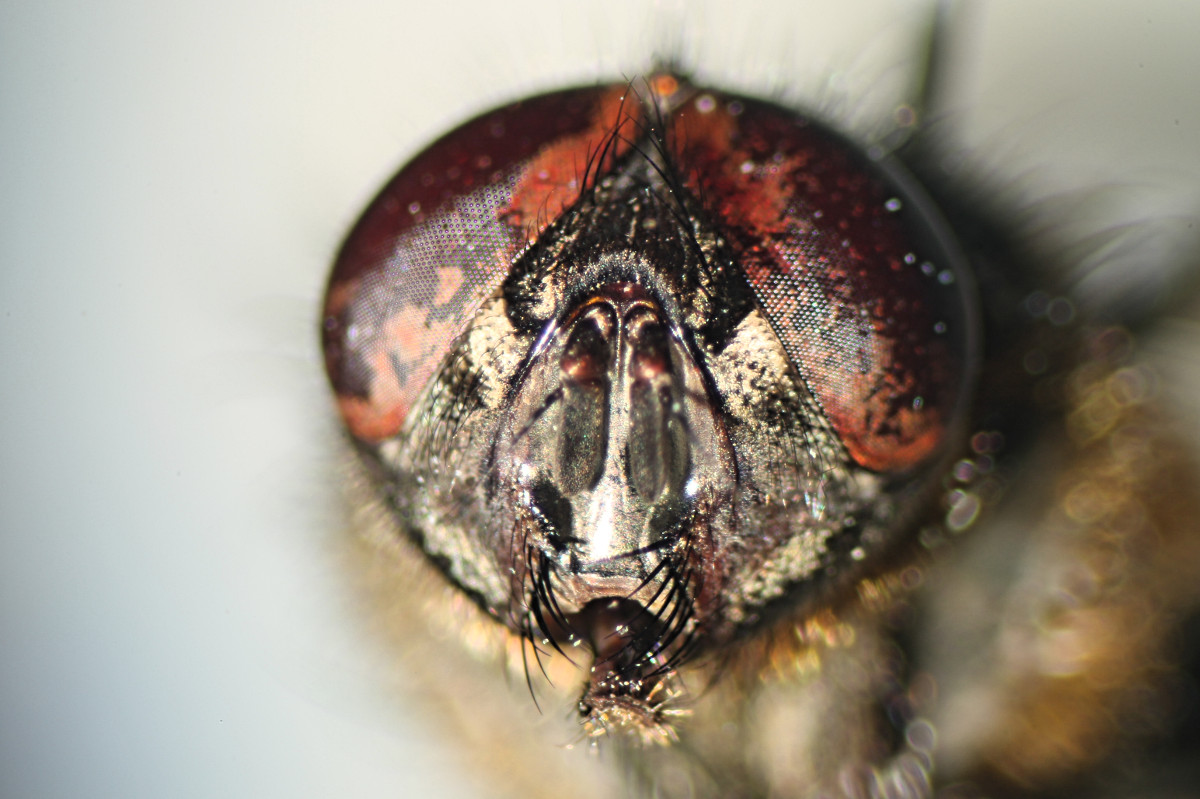
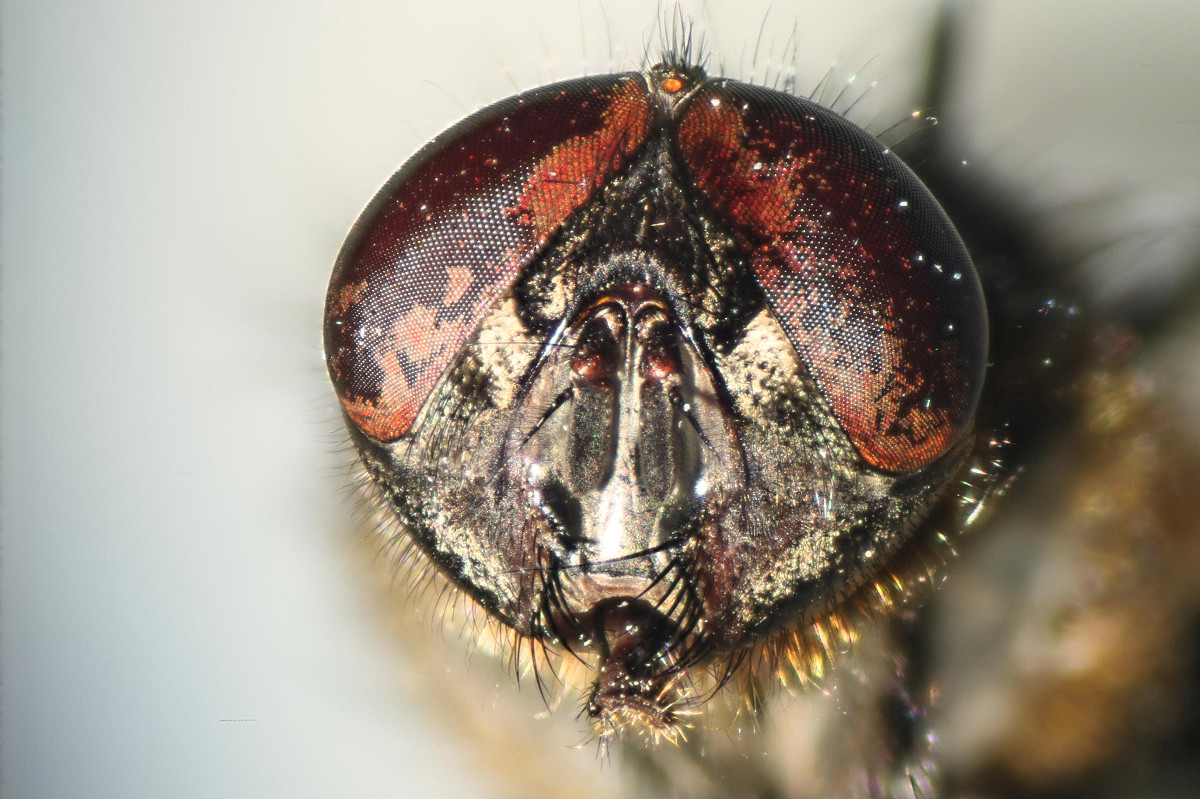
Obviously a dark object against a bright background is difficult
to recognize, to the human eye and also to an electronic sensor.
But note the example below looks more "intuitive" than it actually
is. When you replace the white background by a darker one, the
whole image appears darker to your eye and "intuitively" you want
to remove it. Being a non perfectionist I found it sufficient to
use three differently colored cards, a black, a grey and a white
one.
white background:
|
grey background:
|

|
|
You definitely have heard about focus stacking, a computer
technique to merge a series of exposures taken at different focus
levels into an image with extended depth of field. The special
problem arising with a binocular is, that even if there is a third
tube to attach the camera, only the optical path for one eye is
redirected to the sensor. Taking a series of exposures to be fed
into a stacking program will thus result in an oblique stack,
which has to be corrected by a preprocessing step. I use
"align_image_stack" to correct the oblique stack and "enfuse" for
focus stacking, both from the hugin suite, which is an open source
implementation available for all platforms. Focus stacking with a
binocular make photos more pleasant to look at, but after a while
you'll find out that in many cases you can do without it. In the
example below the only important character is the short facial
keel between the antennae. Vibrissae, arista, and ocelli don't
help very much with identifying a Pollenia labialis.
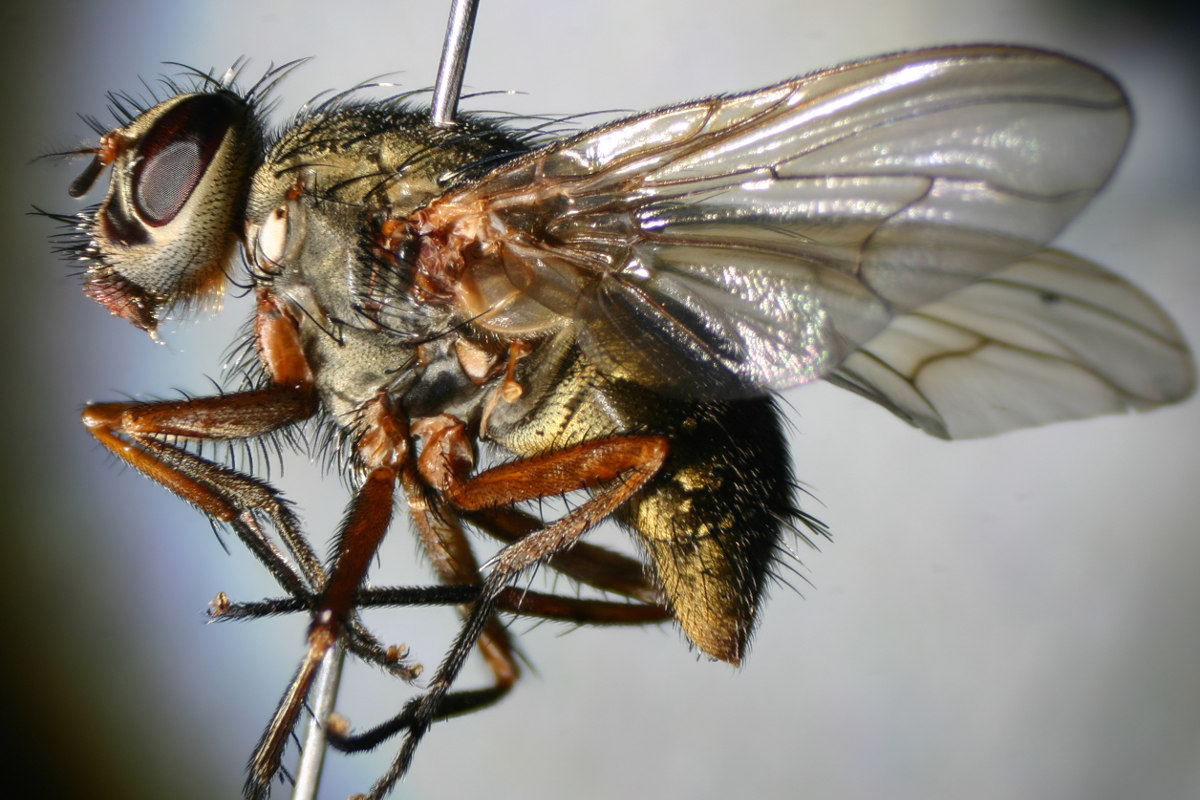
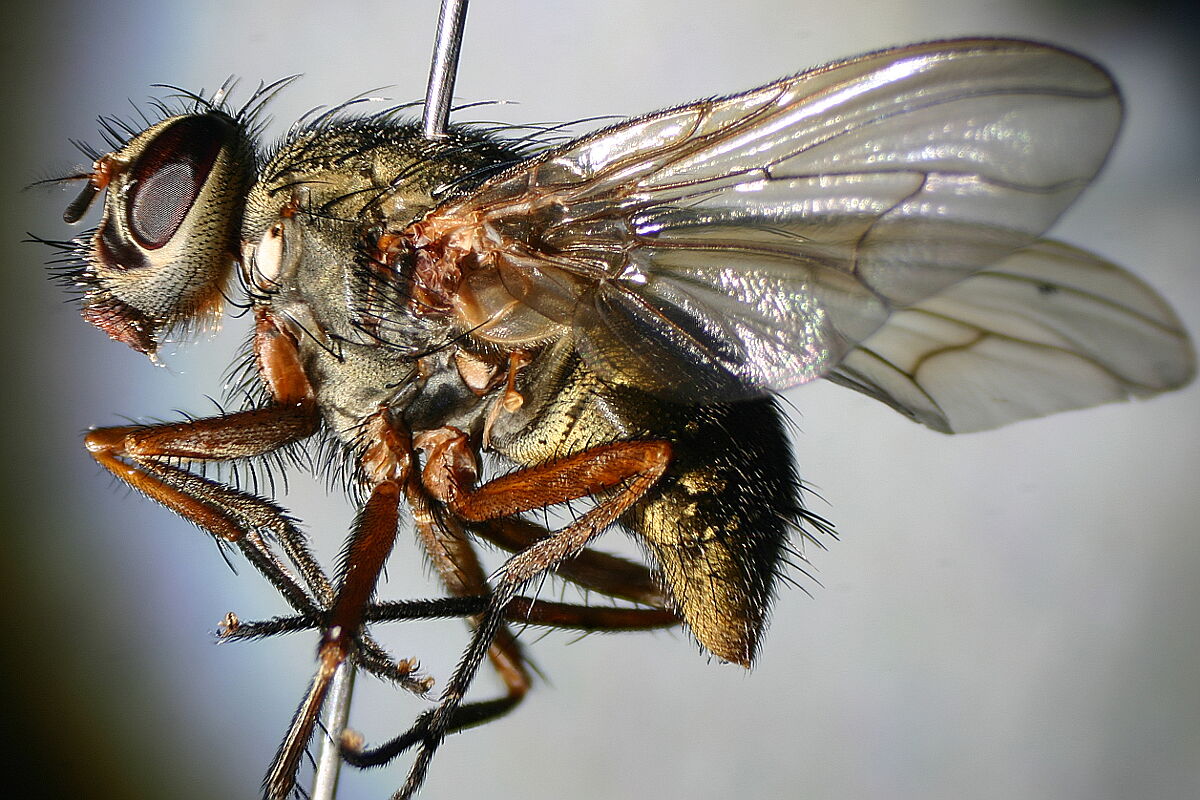
As I'm sure you will do a lot of experiments with focus stacking
anyway, below I chose an example where you can see a typical
problem of stacking. The bristles on the frons are clearly visible
on the single exposure on the left, but the stacking has
calculated them away, because it found the eye facets more
interesting. This often happens when you have two sharp
structures, one above the other, in the same stack.
| single exposure: |
stack of 12 exposures: |
More important is proper scaling and sharpening of the photos. The
typical size of a raw exposure is 3000x2000 pixels. Using more
pixels usually doesn't give better quality. For web presentation,
and even more printed media, these images have to be scaled down
considerably. For this site I chose 1200x800 as the best compromise.
It's a good idea to play around with the sharpening filters of your
image editing program, in gimp it's "Sharpen" and "Unsharp Mask".
Don't give up too early and especially don't make the mistake:
sharpen, zoom in, say "Ah it's pixelised!" and give up. The user of
a website doesn't want to zoom around in an image, but wants to see
the characters in an instant.
only scaled:
|
scaled and sharpened:
|
After a while you'll not only have learned, that there a many more
methods to catch and store specimens, but also have seen many images
of (mostly male) terminalia, in many cases the only way to be sure
that you arrived at the right species name. Among the most advanced
keys is, e.g., the one on Fennoscandian Drosophilidae (Fauna
Entomologica Scandinavica). Equipped with a good binocular, you can
often see enough of the epandrium, surstyli, ... to make a reliable
identification, but for photos with higher resolution you need to
use a compound microscope, and start with clearing and dissection (Working at Higher Resolution)